
This post is from a suggested group
It's not quite perfect, but please bear with me, haha.


151 Views
This post is from a suggested group
This post is from a suggested group
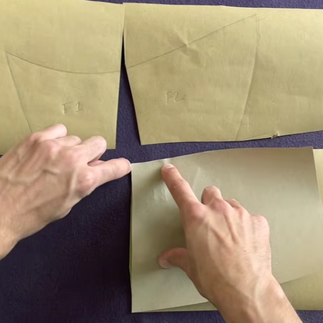
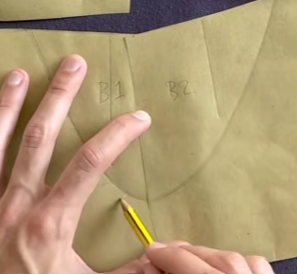
Started with something super geometrical. My pattern was satisfactory, but I had a tough time taping everything together.


This post is from a suggested group
Starting in on the lessons and completed my second ham!
The first one I left at my old shop, as it became an important part of daily pressings.
I made my own pattern. Basically, I wanted something like a torso to press with. I used a metal compass and a framer's square.
I went to the thrift store and got all the fabric I needed for $3.
I went to Tractor Supply and got a bag of saw dust for $8.
Inner-bag is chordoroy and flannel and the outer-bag is a super-think hunting twill.
This post is from a suggested group
Hello, I just received my purple box and I’m excited to get started with the lessons. I’ve setup my studio and I’m happy with it. I could not find moleskin and got a bit impatient so ended up using multiple layers of felt and broad cloth for the top. I may soon replace the felt with an industrial felt sheet but1/4 inch of that is more expensive. I will also redo my top with a duck canvas soon but this will work for now.
I’m looking forward to making a couple hams next.


This post is from a suggested group
Hello all! I’m excited to join this group and get started on my tailoring journey. I’ve been sewing for a few years but have never made a jacket. Im looking forward to learning a lot here.
Same boat, here. I've been working at a custom suit shop, so I've been doing lots of measuring, some basic in house alterations, and tons of pressing, but no jacket sewing yet.
Very excited to start! I just finished my pressing ham!!!!!!


This post is from a suggested group
Hi Everyone,
Currently following the Pagoda Model course and have found myself a bit stuck with the Pagoda shoulders
I've noticed that as supposed to the pattern in the video, which should be matched edge to edge, i find that in my pattern, one is curved and and one is straight. How do i proced with matching them edge to edge?
I attempted to match them on the TRUE edge but they were not aligning. I then jump to the step when you pivot the patterns from a 5mm SA point on both pattern pieces. Do i just continue to draw a smooth curve? What am i missing?
Hello! What you're missing is that the pattern you downloaded contains both a surface shape and a forward seam design. That is why the front curve is straight and the back curve hollow. The finished result should be a shoulder pad with a negative surface curve and a froward curved seam. If you watch the entire Lesson 27 on shoulder theory, it will all make sense. Reza International School of Tailoring
This post is from a suggested group
Hello everyone,
I’m currently drafting a jacket for a friend, inspired by the James Bond “Haiti” style.

I’m running into a fitting issue that I can’t seem to resolve.
The Problem
The jacket fits perfectly when he first puts it on. The chest line is really perfectly perpendicular to the floor, the balance looks spot on, and the overall hang is clean af.However, once he starts moving even slightly, the entire garment shifts backwards. It slides down from the neck — not dramatically, but enough that it no longer sits at the 7th cervical vertebra where it should. It feels as if someone is pulling the jacket downward from the lower back. There is no collar gap, really, though.The result is that the originally correct balance turns into a long back balance, and excess fabric starts pooling above the seat.See pictures below:
Is there any chance you have a picture of the guy in the jacket? I've delt with this a few times in the custom suit shop I worked at.
Sometimes the shoulder point-to-point is just ever so slightly too small, so the jacket tends to want to float and readjust upon movement. Same thing with shoulder slopes.
Like...standing in a mirror...the jacket looks aces...but once the client moves, the jacket gets thrown backwards and becomes massively unbalanced.
Furthermore, I had issues with clients and measuring postures. They'd have one posture and stance while measuring, and another while wearing the suit, which throws the fit off.
By no means am I certain in my suggestion, but I feel like it would be worth exploring. Unfortunately, letting out the shoulder is...idk...kinda impossible...lol...so hopefully I'm wrong.
Please, let me know how this turns out!
This post is from a suggested group
Hi all! I'm new to this and wondering if there is anything explaining how to create a paper template based on my measurements? Is there a formula demonstration etc? Many thanks! Dave
This post is from a suggested group
Hi All
I have just come to Forum and really appreciate the collective knowledge there is here and thank Resa and Mowgli for all their commitment to tailoring.
I have some limited experience having starting sewing only a few years ago during covid and completed a couple of floating canvas constructed coats and trousers in wool. I am just about to move onto a linen suit using Resa's video series. I have ordered the linen from Baird McNutt as recommended by them: Milltown Plain Weave 228gsm 6.7oz/yd. I am planning to half line it with taped seams where visible. Now, the coats I have been making with to date have had canvas, horsehair, and domette. This seems definitely over kill for a summer suit. What should I do?
Full or Half Canvas?
Just a 210g Hymo Canvas like Giove with no horse hair or domette. I would guess that this…
Students who signed up for our newsletter report a deeper understanding about the craft in general and the industry as a whole.
Sign up today for free and receive a weekly / monthly letter that will help you make informed decisions for your way forward in your learning.


Good for you. Don't give up.